v2ray 免流 2021 - 更新 手厅已挂
引用
https://blog.folklib.com/2021/02/04/32/
https://loukky.com/archives/1384
说明
3年前已经写过一篇关于免流的文章,可能是当时刚才开始了解免流,配置比较麻烦,
我们先假定已经有可以的v2ray服务器了,我们只需要在添加一个inbound就行。
通过 Websocket 协议实现免流:
由于服务器的80端口已经被nginx占用了,所以v2ray监听一个其它端口,然后nginx转发这个端口就行了。免流必须使用80端口。
服务端 v2ray inbound & nginx 配置
{
    "port": 15000,   /* 这个端口和nginx设置一致*/
    "listen": "127.0.0.1",
    "protocol": "vmess",
    "settings": {
        "clients": [
            {
                "alterId": 64,
                "id": "xxxxxxxxxxxxxx",
                "level": 1,
                "email": "[email protected]"
            }
        ]
    },
....
N1 install Armbian 20.10 & docker openwrt | 斐讯N1安装 Armbian 20.10
N1 刷入 Armbian 20.10 并安装docker 运行openwrt做为旁路由
引用
https://www.right.com.cn/forum/thread-4057162-1-1.html
https://www.shintaku.top/posts/docker-openwrt/
https://disk.yandex.com/d/srrtn6kpnsKz2
https://forum.armbian.com/topic/12162-single-armbian-image-for-rk-aml-aw-aarch64-armv8/page/38/
https://forum.armbian.com/topic/5549-samba-setup/
https://blog.ztluo.dev/post/0057-phicomm-n1/
下载最新的Armbian系统,
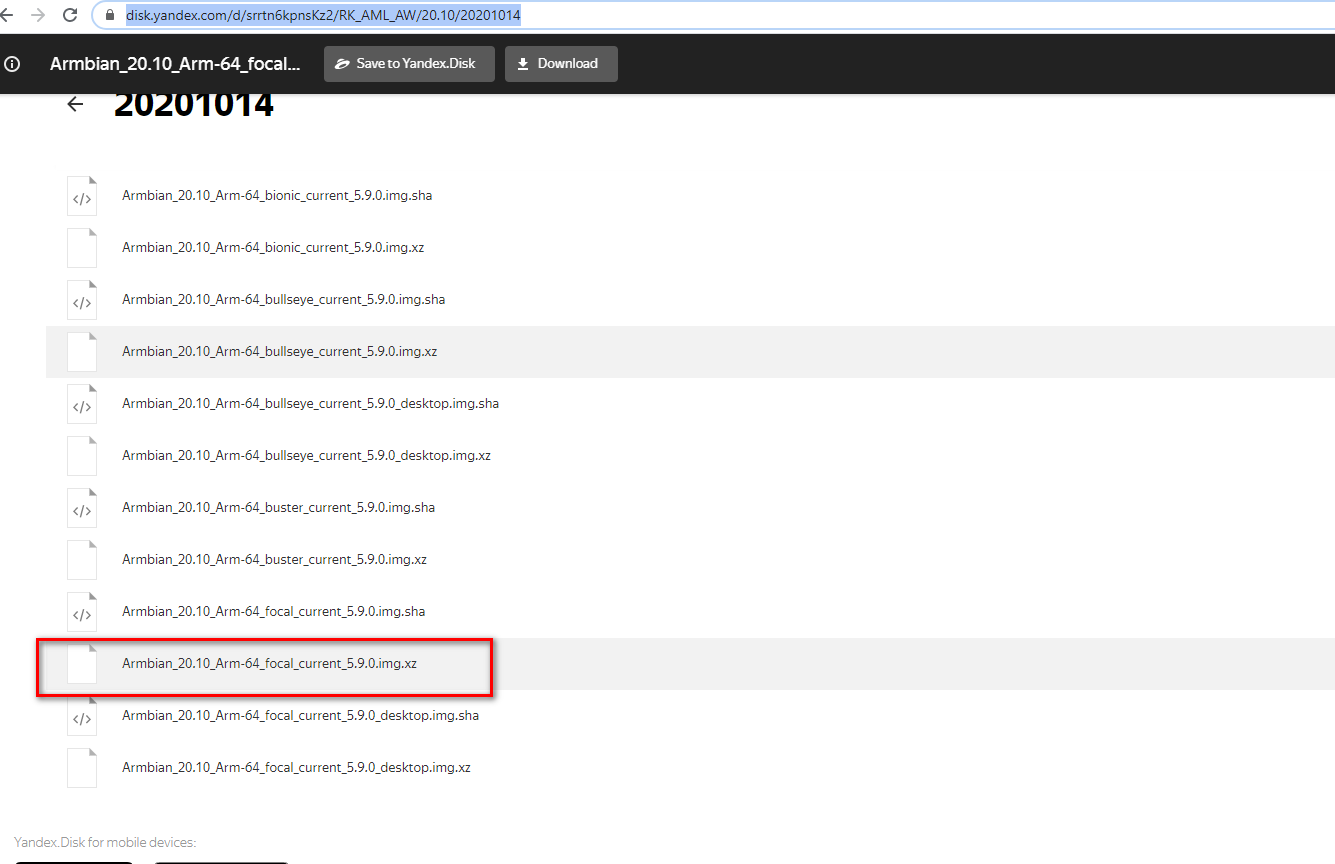
我选择的是:Armbian_20.10_Arm-64_focal_current_5.9.0.img
打开https://disk.yandex.com/d/srrtn6kpnsKz2/RK_AML_AW/20.10/20201014 选择相应的文件下载到本地
N1 docker openwrt ssr plus 无法启动 / ShadowsocksR Plus+ 未运行
问题
ShadowsocksR Plus+ 未运行
配置节点完成后,一直无法启动, ssh 到openwrt ,
直接运行 /etc/init.d/shadowsocksr start
提示如下
root@OpenWrt:/etc/init.d# ./shadowsocksr start
ssr-rules[10170]: Can't redirect, please check the iptables.
参考
https://www.gitmemory.com/issue/bobotoy/N1-Openwrt-Actions/1/610933690
https://www.shintaku.top/posts/docker-openwrt/
解决方法
docker版本 ssr 无法启动,手动启动提示这个ssr-rules[xxx]: Can't redirect, please check the iptables.
选 仅常用端口(不走P2P流量到代理) 就无法启动。
国内机 DD 脚本
文本主要备份Linux DD系统脚本, 方便后续使用
引用
https://git.beta.gs/
https://www.hostloc.com/thread-779358-1-1.html
https://gist.github.com/i-sync/1fb1c3d105abda353ba688b6db3992dc
话不多说直接上
#Debian/Ubuntu:
sudo apt-get update && sudo apt-get install -y xz-utils openssl gawk file net-tools

#RedHat/CentOS:
yum update && yum install -y xz openssl gawk file net-tools


wget --no-check-certificate -qO InstallNET.sh 'https://moeclub.org/attachment/LinuxShell/InstallNET.sh' && chmod a+x InstallNET.sh


#使用方法
bash InstallNET.sh
-d/--debian [dist-name] #发行版本代号
-u/--ubuntu [dist-name] #发行版本代号
-c/--centos [dist-version] #发行版本代号
-v/--ver [32/i386|64/amd64] 版本号
--ip-addr/--ip-gate/--ip-mask #自定义IP、网关、掩码
-apt/-yum/--mirror
-dd/--image #使用定义镜像
-a/-m  #a是自动安装。如果不指定或者指定为 m 则需要去 VNC 手动安装


sudo bash InstallNET.sh -u 18.04 -v 64 -a --mirror 'https://mirrors.163.com/ubuntu/'
sudo bash InstallNET.sh -u 18.04 -v 64 -a --mirror 'https://mirrors.tuna.tsinghua.edu.cn/ubuntu'

sudo bash InstallNET.sh -u 18.04 -v 64 -a --mirror 'https://mirrors.ustc.edu.cn/ubuntu'
sudo bash InstallNET.sh -u 18.04 -v 64 -a --ip-addr 10.0.8.16 --ip-gate 10.0.8.1 --ip-mask 255.255.252.0 --mirror 'https://mirrors.ustc.edu.cn/ubuntu'
SSHD 启用密钥登录
文本仅做简单记录
- 首先在服务器上生成密钥和公钥, 使用ssh-keygen, 默认会在~/.ssh目录下生成两个文件 id_rsa(密钥), id_rsa.pub(公钥)
- 复制id_rsa.pub为authorized_keys
- 修改/etc/ssh/sshd_config配置文件
PubkeyAuthentication yes
#AuthorizedKeysFile     .ssh/authorized_keys .ssh/authorized_keys2


最后可以禁止密码登录,首先确保密钥登录成功
#PasswordAuthentication no
- 把id_ras复制到客户端,linux 直接使用 ssh -i 参数指定密钥, windows, xshell, 选择验证方式PublishKey, 然后导入id_rsa密钥即可。
iHuman Android API 请求sign计算方法
本文主要讨论API请求sign计算方法
背景
iHuman Android APP 里面有一些音频资源,直接抓包就可以拿到请求参数,然后直接可以用来请求资源。
由于timestamp没有检验,抓到的请求参数在登录信息没有变更的情况下应该是可以一直使用的,
但是如果你在登录的设备上重新登录或者登录其它账号,那么之前的请求参数就不可用了,需要重新抓包。
Example
{
    'uid': '123456',
    'app_version': '4.1.0',
    'sign': '02049776b9faba39d375e2a44ewgwkqw288sf3sfa6ab16875063d49ad9f0ed494'
    'device': 'phone',
    'deviceid': '403d8d2wqf32453tre6t34t345yt4ec03a',
    'platform': 'Android',
    'token': '00MYUISKWU923kjsdfuih3CFzwaw9ku5OAElVvvOg=',
     'timestamp': '1611029052'
}
先看一下主要的参数
uid: 就是用户的唯一IDapp_version: 使用app版本,sign: 就是使用其它的某些参数,通过一定的加密算法得到的,下面主要讲如何计算该签名device: 好像是固定的phone.deviceid: 每一台设备都会有一个唯一的ID,platform: 我的是Android,token: 应该是服务器签发给客户的一个凭证,timestamp: 就是时间戳
最终我们大概得到这样一张表
| Field | value | 8 | 10 | 15 | 27 |
|---|---|---|---|---|---|
| uid | 1 | ✘ | ✘ | ✔ | ✔ |
| deviced | 2 | ✘ | ✔ | ✔ | ✔ |
| timestamp | 8 | ✔ | ✔ | ✔ | ✔ |
| token | 16 | ✘ | ✘ | ✘ | ✔ |
Sitecore 9.3 SXA lowercaseUrls is not working
Reference
https://doc.sitecore.com/developers/93/sitecore-experience-manager/en/build-item-and-media-urls.html
https://www.pintle.dk/insights/link-generation-in-sitecore-9-3/
Starting from Sitecore 9.3 there are changes to link generation functionality as well as enhancements to URL builder options configuration capabilities
The follow config comes from sitecore showconfig
<!--  URL BUILDERS  -->
<!--  URL BUILDERS  -->
<links>
    <urlBuilder>
        <alwaysIncludeServerUrl>false</alwaysIncludeServerUrl>
        <languageEmbedding>asNeeded</languageEmbedding>
        <languageLocation>filePath</languageLocation>
        <lowercaseUrls>true</lowercaseUrls>
        <encodeNames>true</encodeNames>
        <useDisplayName>false</useDisplayName>
    </urlBuilder>
    ...
</links>
在Linux上使用redsocks, shadowsocks/v2ray进行全局代理
0x1.引用
0x2.背景介绍
由于所处的网络环境被限制,无法使用Aria2等BT工具下载种子,所以只能使用代理伪装一下
把所有流量都转发到代理服务器上.
0x3.前提
默认电脑上已经安装shadowsocks, v2ray等代理软件,并打开了1080(socks5)代理端口,或其它的代理方式.
0x4.安装redsocks
本篇主角redsocks登场, 首页安装redsocks,这里使用仓库安装sudo apt install redsocks
安装完成以后,默认配置文件:/etc/redsocks.conf
一些常用的命令:
sudo service redsocks start     #打开redsocks
sudo service redsocks stop      #停止redsocks
sudo service redsocks restart   #重启redsocks

sudo systemctl enable redsocks  #开机启动redsocks
sudo systemctl disable redsocks  #停止开机启动redsocks
v2ray-plugin & v2ray as server
引用
https://www.viagle.cn/blog/0015661425086431d7c969c88854e5294d6b8ee4efc3c13000
https://github.com/v2ray/discussion/issues/173
说明
在上一篇里shadowsocks v2ray-plugin websocket tls nginx, 我们介绍了v2ray-plugin的使用方法, 客户端[Client]: shadowsocks + v2ray-plugin , 服务器[Server]: nginx + shadowsocks + v2ray-plugin,
现在把服务器端修改为:nginx + v2ray. 配置文件和之前的v2ray配置稍为有点不同。
步骤
如果想用 v2ray做服务器[server], shadowsocks + v2ray-plugin做客户端[client]的话需要在server
- 设置一个任意门(tag:ws-in),地址设置为
v1.mux.cool,传输协议设置websocket - 设置一个ss inbound (tag:ss-loc),传输协议不配置
- 设置一个freedom outbound (tag: ws-out),redirect到 ss-loc这个inbound
- 配置路由 ws-in -> ws-out,ss-loc -> 默认freedom
shadowsocks v2ray-plugin websocket tls nginx
Shadowsocks 使用v2ray-plugin插件 与nginx配置
引用
https://github.com/shadowsocks/v2ray-plugin
https://gist.github.com/shuanghua/c9c448f9bd12ebbfd720b34f4e1dd5c6
https://github.com/M3chD09/shadowsocks-with-v2ray-plugin-install
https://github.com/shadowsocks/v2ray-plugin/issues/48
https://github.com/v2ray/discussion/issues/173
说明
从去年开始就一直再使用v2ray+websocket+nginx, 一直都很稳定, 也有可能是人个使用流量比较小, 也是不完全是之前SS(SSR)也是个人使用, 不知道为什么就被封了, 哈哈,
简单说下v2ray使用过程,
- 服务器端(linux)很好部署一行命令就搞定了,
bash <(curl -L -s https://install.direct/go.sh), - windows客户端
v2rayN也很好使用, 和windows版的$$差不多, 简单配置一下就好了, - 最主要的是Anroid客户端, 后台常驻,又不想单独设置, 所以自动分流比较重要 常用的:
- bifrostV 不开源,有广告, 自动分流比较好使
- v2rayNG 开源, 无广告, 自动分流不太好使
- Kitsunebi 今年才听说, 尝试了, 自动分流效果一般
以上几个就自动分流效果都不能和SS的GFW列表相比, 今天正好有时间看了一下v2ray-plugin. 有了之前v2ray+websocket+tls+nginx的经验, 这次的配置相对简单.
